How to deliver opt-ins with Flodesk
What's inside this post: Hide
FULL DISCLOSURE: I no longer use Flodesk myself, BUT this post is still full of helpful insights for those who are interested.

📌 Pin it for later!
I've seen this question pop up a lot, so it’s time to tackle it!
Flodesk's pricing scales with your list size — so the earlier you start building, the more time you have at a lower tier before you need to upgrade. Check their current pricing to see what works for your list size.
The bottom line: Flodesk is built to make freebie and opt-in delivery really simple — no complicated tech, and without needing Zapier to automate any of the steps for you.
Maybe you’re thinking about switching over, –but what about sending opt-ins to subscribers?
Does Flodesk integrate well with Squarespace?
Would it be delivered with a link or a file?
Can you even do that with Flodesk?
Is it complicated or easy?
Yes, yes, yes, and yes ––it’s definitely easy. Let’s dive in!
Delivering your freebies with Flodesk* is easy
One of the main reasons I love Flodesk is that it creates beautiful emails. But also very important, –it is super simple to use in general. So easy that when I first started using it I was double checking everything because I couldn’t believe how easy it all was!
In fact, if you’ve ever used any email marketing app before, you’re probably totally okay to figure this out on your own without my help.
But if you’re a little uncomfortable with the setup or if you don’t have a Flodesk account yet, you can see how easy it is to set this up in 6 easy steps!
(Click here to jump to the video, or keep scrolling to read through it.)
How to set up Flodesk opt-in delivery: 6 simple steps
Before you get started you’ll need to go ahead & set up your first form in the Forms tab inside your account, and create a segment (grouping) for subscribers who opt-in with that form.
I’m not going over that part today, because it’s SUPER simple to set up. If you have any questions about how, just leave a comment below or send me an email to let me know you’d like to see a tutorial for that too. 😉
Step 1: Create a new Workflow in Flodesk
Log into your Flodesk account, click the Workflows tab at the top/center of the page.
Then click the black “+ Create New” button.
Step 2: Set your Workflow trigger & choose an email template
Choose your Workflow trigger. In this case, it’ll be when a subscriber is added to a specific segment, so click the Trigger area inside your Workflow editor. Then choose the segment or segments that will trigger the delivery of this email you’re about to set up.
Next you’ll choose an email template design for a great starting place, or start a new email design from scratch (takes a little longer).
Step 3: Design your opt-in delivery email
Edit your email’s content. Change images, colors, fonts, content/copy, etc.
Flodesk will be saving all of your changes in the background while you work.
Step 4: Add your freebie link or file
Next we’ll add your freebie! There are 2 ways to do this, depending on whether you used a template or started from scratch:
Option A:
If your template already has a button somewhere in the design, click the button block to edit what happens when a reader clicks on it. You can paste in a URL or upload a file in the ‘Link’ area of the settings panel on your right.Option B:
Add a button block by hovering over the email content and clicking any of the plus sign icons that pop up between block boundaries (those are your insert markers, similar to Squarespace), then selecting “button” from the choices. Then follow the steps listed in Option A, above.
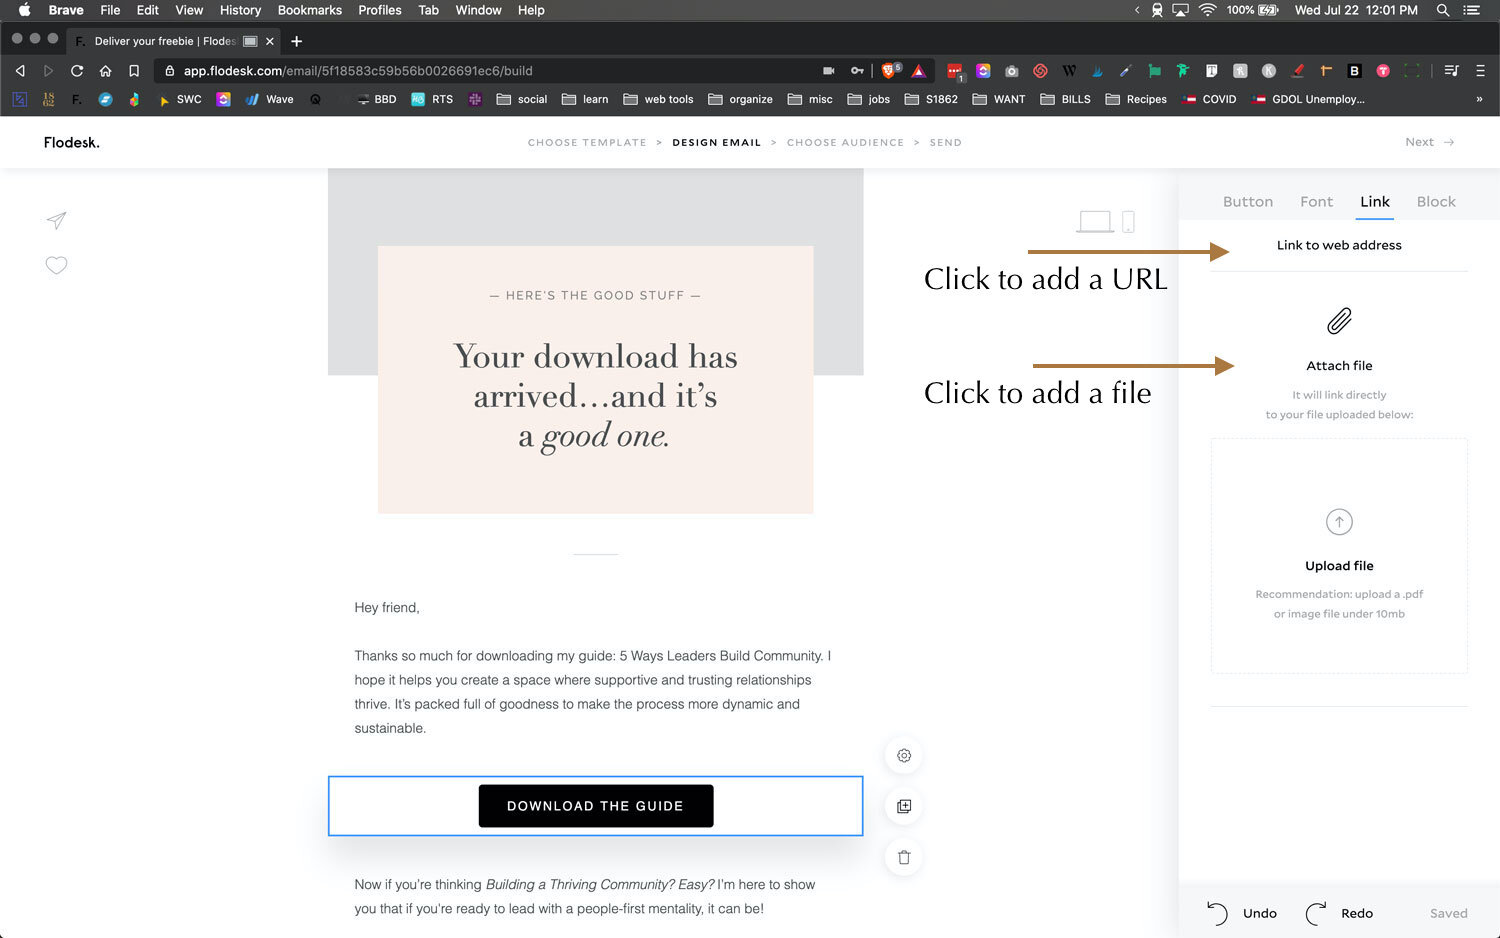
how to link a button in an email to either a file or linked web address, 2020
Step 5: Test your email before publishing
Once you’re done with editing the design, you can save that design to your Favorites by clicking the heart icon on the top left.
You can also send a sample of this email to yourself to check that everything is working by clicking the paper-airplane icon & following the prompts in that pop-up sender (it will not send to your segment list; only to the emails you add in the test/pop-up).
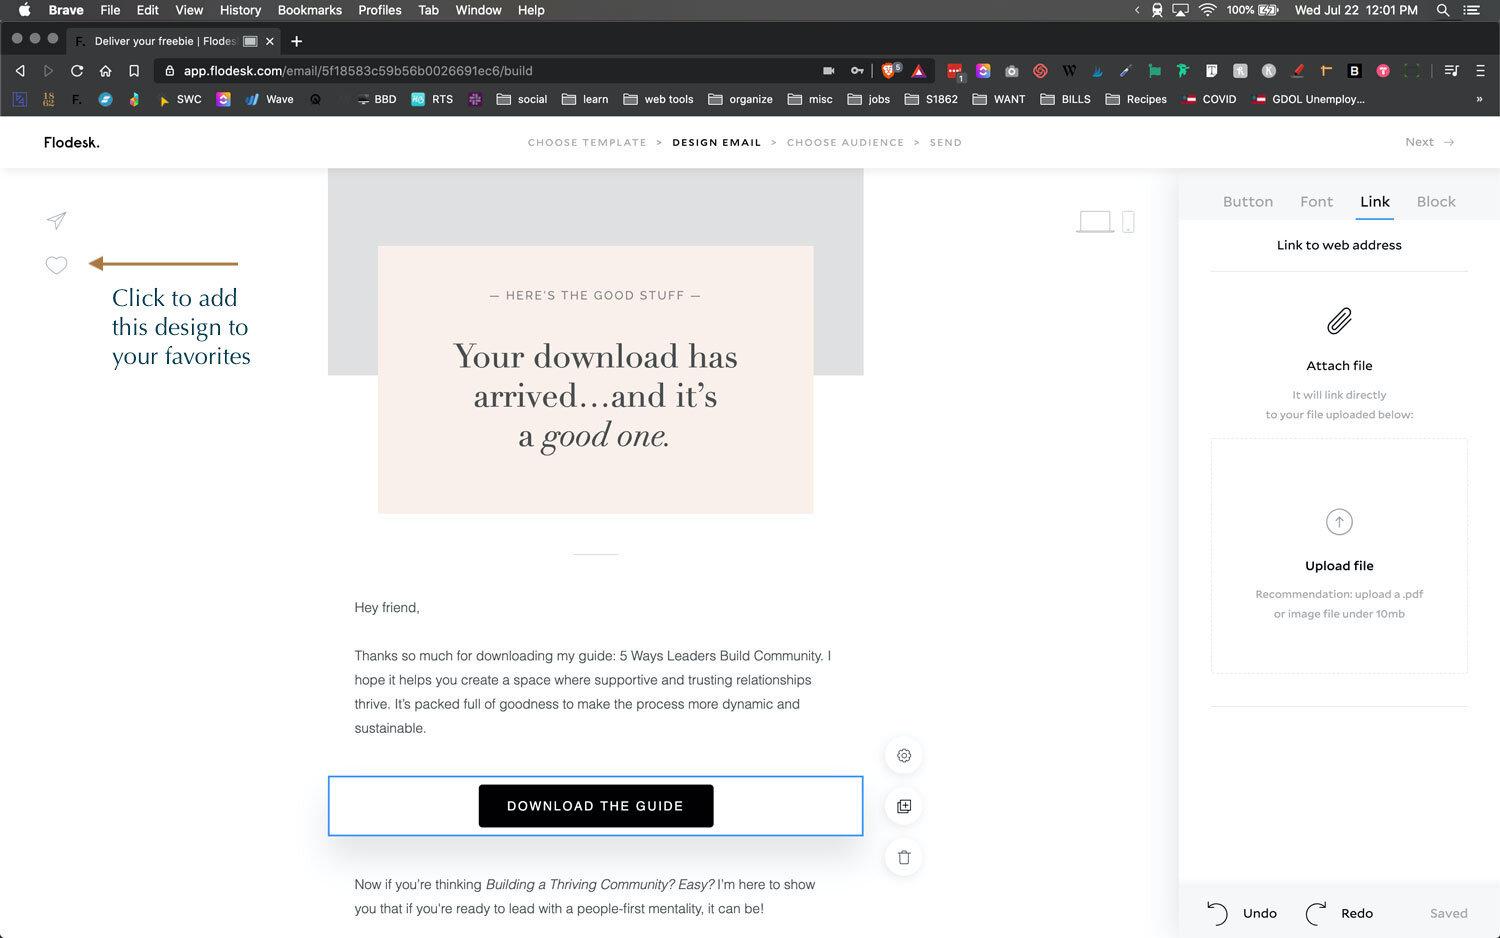
how to add an email design to your account favorites, in order to reuse the layout in future emails as a template, 2020
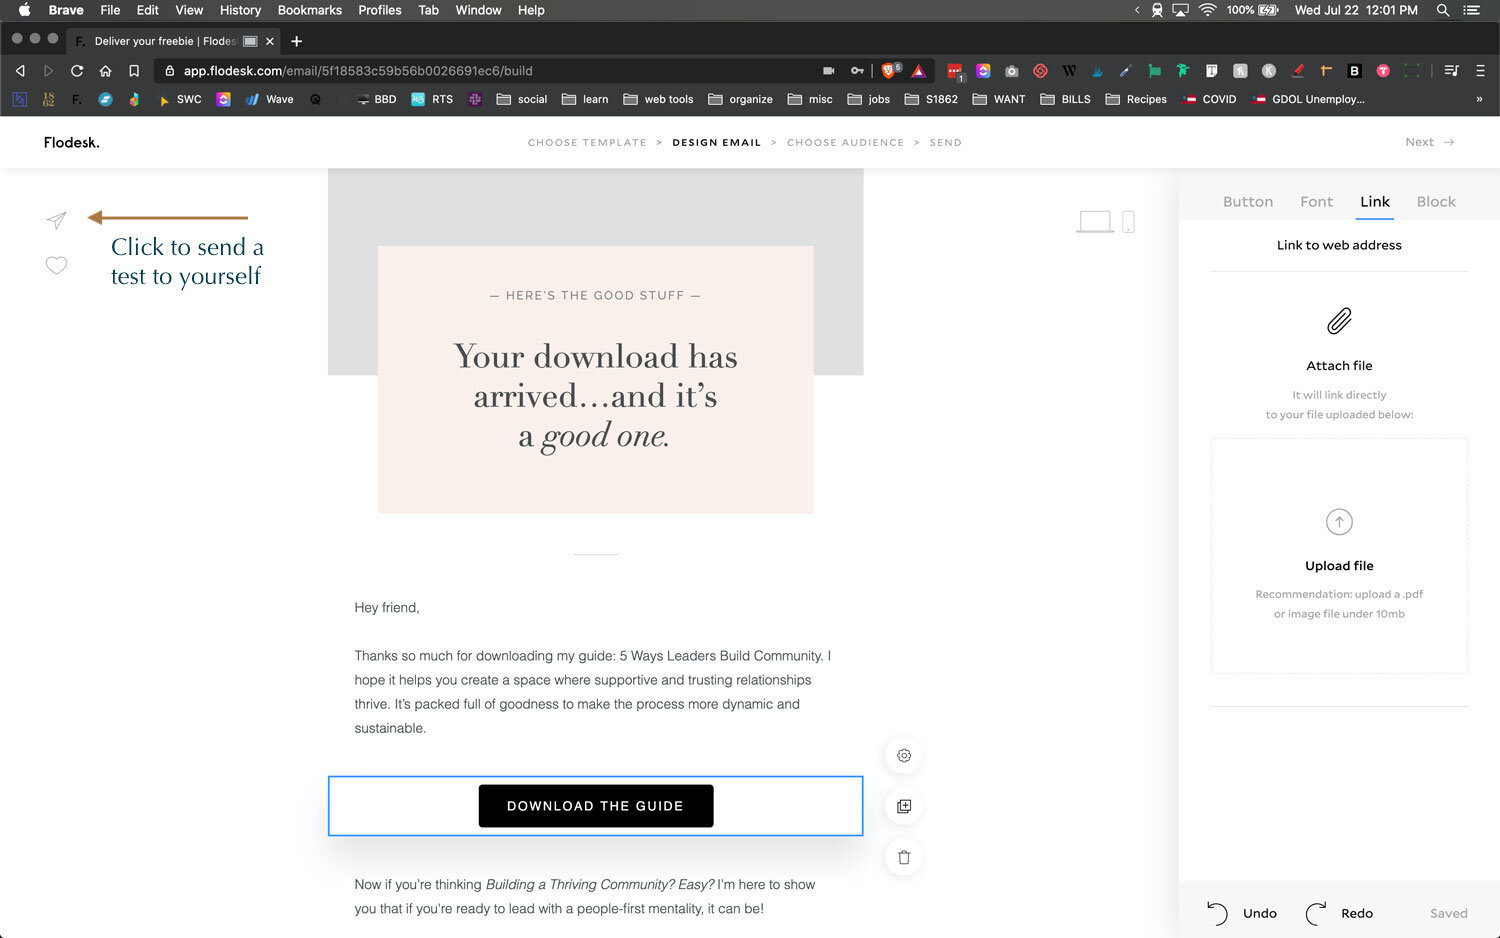
how to send an email design to yourself to test the button, 2020
When you’re satisfied everything looks good & is working properly:
Click ‘Next’ in the upper right-hand corner. This wraps up the editing process for the email inside the workflow, but doesn’t Publish just yet!
Step 6: Set your subject line & publish
You’ll be taken back to the Workflow editor.
Choose the subject line and the preview text right underneath the preview of your email in the right-side settings panel.
Click Publish!
Heads up: This video was recorded in 2020 — Flodesk's interface has been updated since then, but the core steps for setting up opt-in delivery still work the same way.